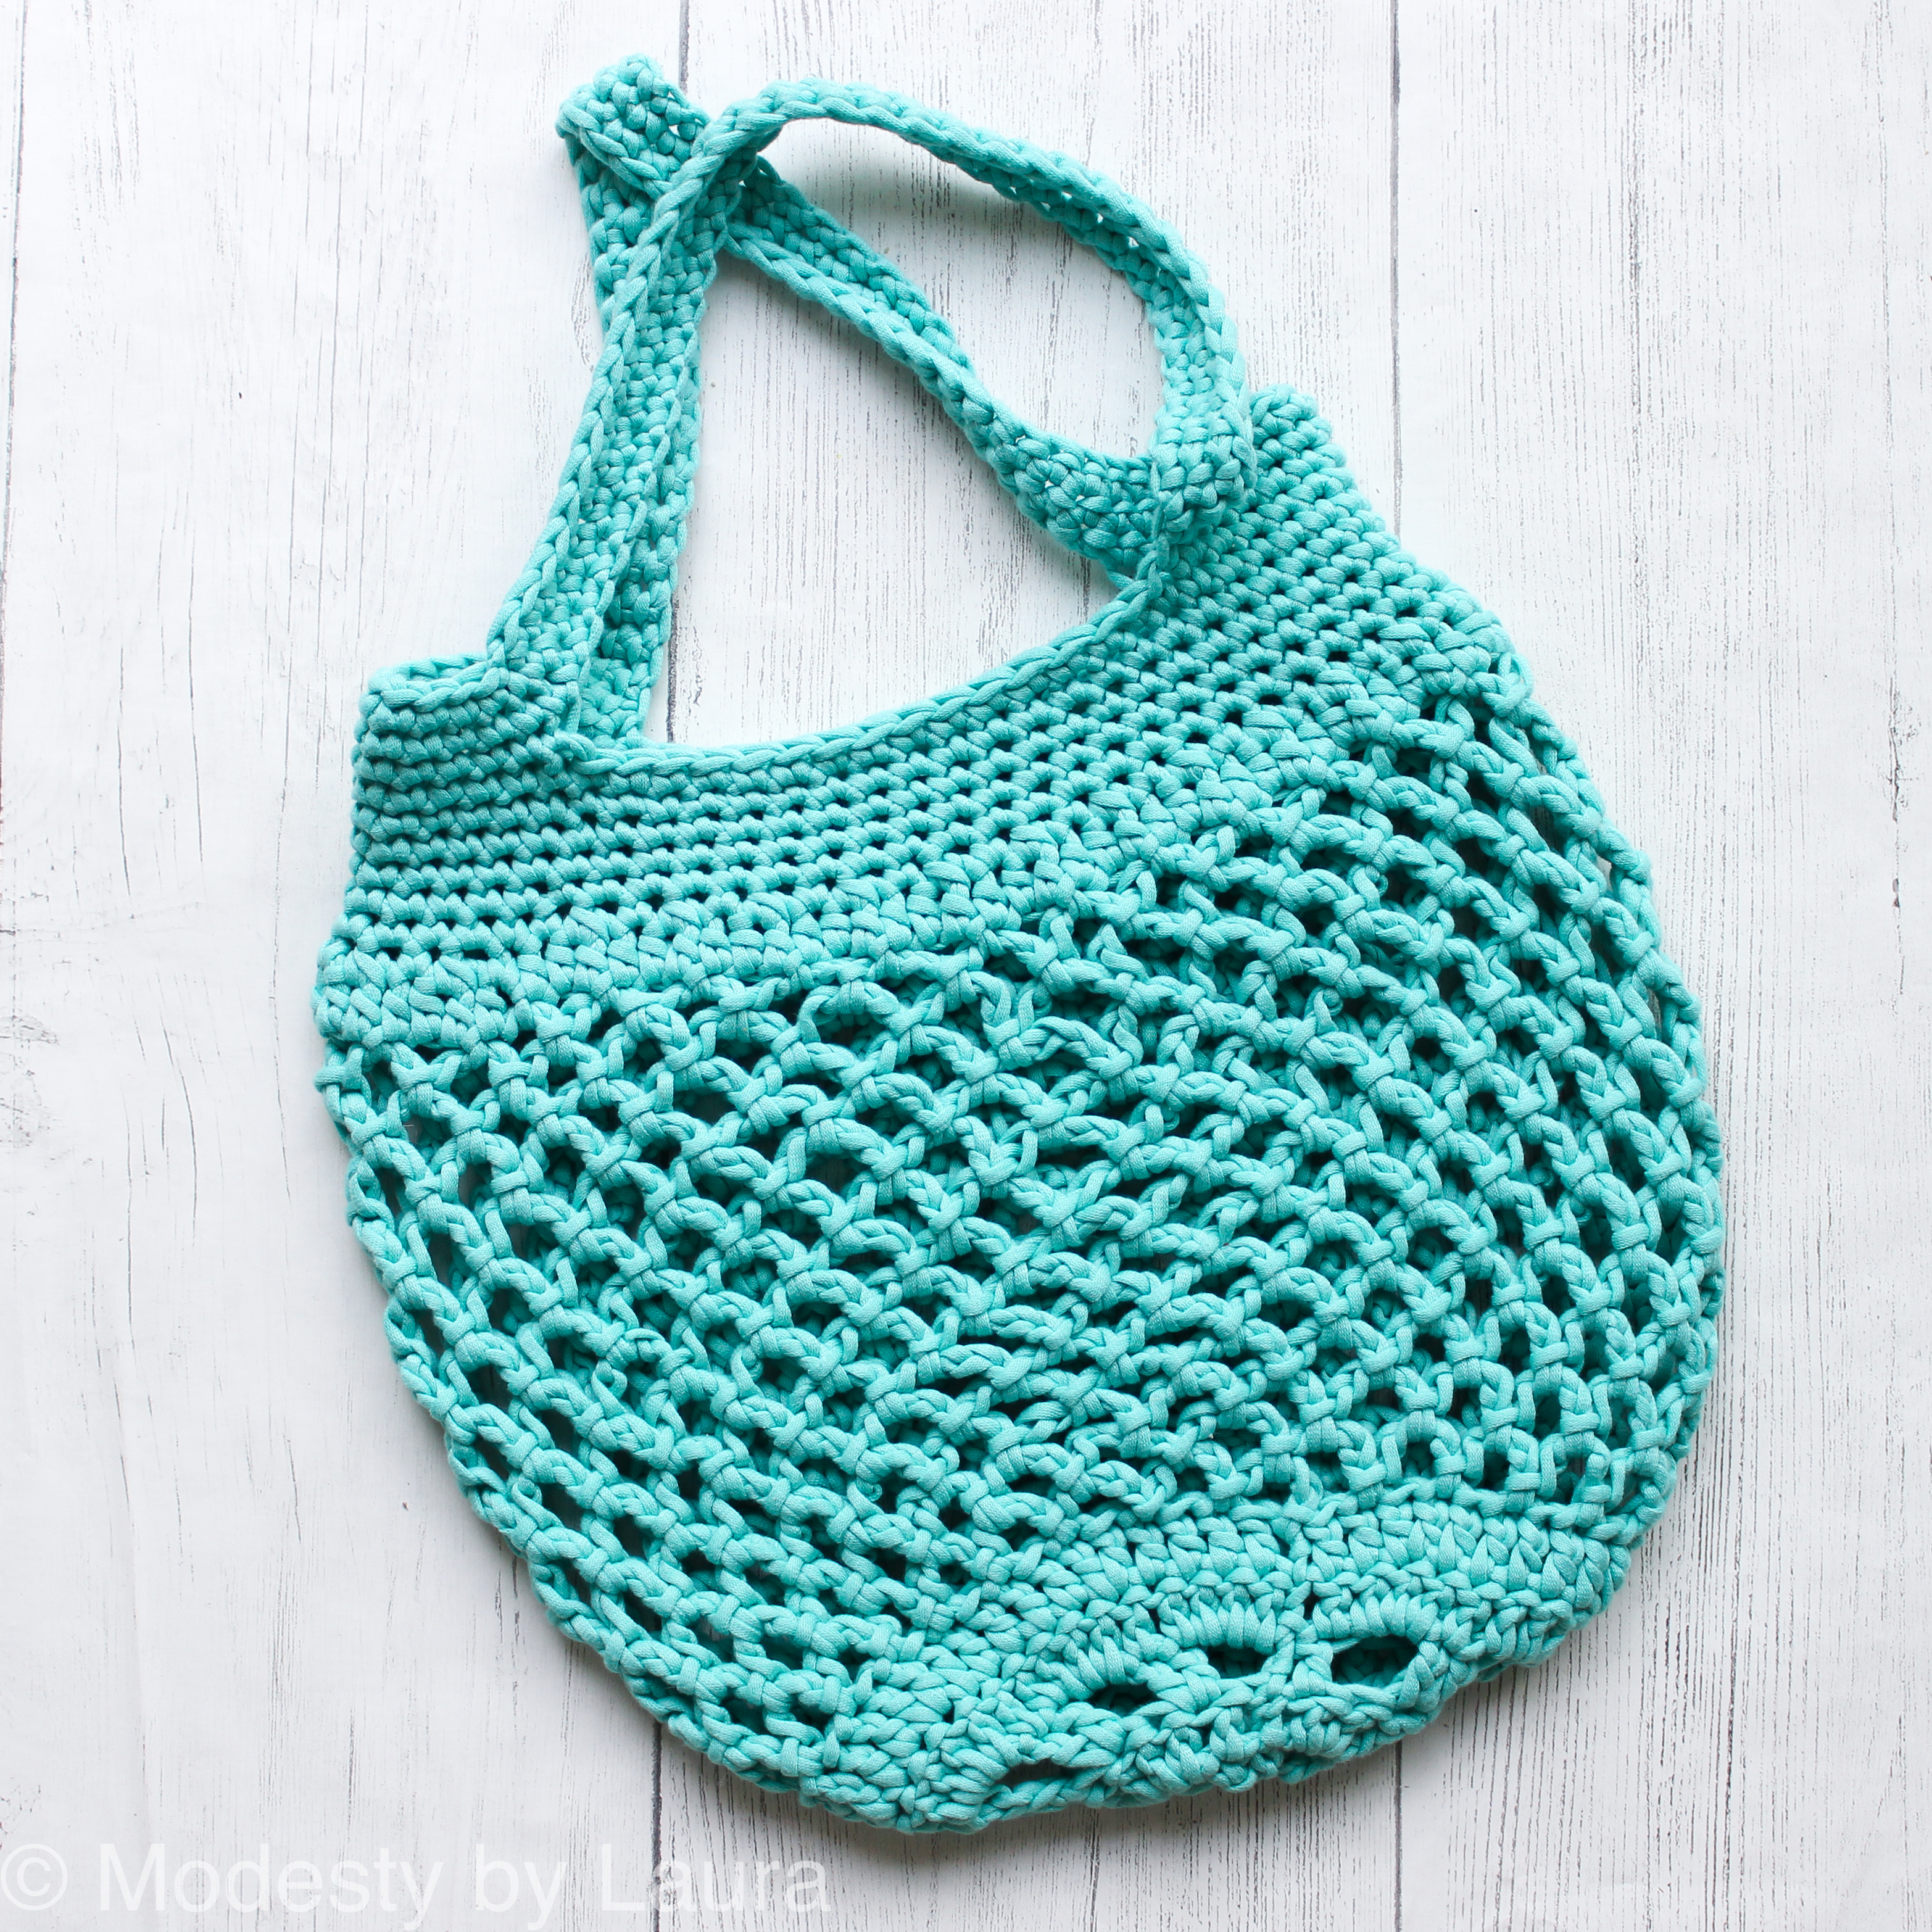

Middleton Market Bag Crochet Pattern
Shop Modesty by Laura
Middleton Purse

Middleton Tote


Design Story
The Middleton Market Bag was designed last year along with two other crochet bags. The Middleton Bag Collection came about because I was at a loss for inspiration for summer wear. So, I visited the world of accessories. The Middleton Market Bag went through not 1, not 2, but 4 revisions. It was a learning experience and I enjoyed designing the perfect market mesh bag.
The Pattern
This crochet pattern is quick and beginner-friendly. It is constructed from the bottom-up starting with a magic circle and slowly making its way up with multiple chains.

Materials
Abbreviations
MR- magic ring
ch-chain
chsp-chain space
dc-double crochet
hdc-half double crochet
sc- single crochet
sc2tog-single crochet 2 together
slst-slip stitch
st-stitch
Gauge
10 sts and 8.5 rows is 4”.
Notes
The bag is worked in rounds. It is highly recommended that you use a stitch marker to mark the beginning of the round.
The chain 2 in the beginning counts of each round counts as a stitch.
Pattern
Create a Magic Ring
Round 1: ch 2, dc in the MR, *ch 2, 2dc cluster* repeat for a total of 4 times, ch2, slst at the top of the ch 2, turn your work (5 chsps)
Pull the MR closed.
Round 2: ch 2, 2dc in the next chsp, *dc in the next st, 3 dc in the next ch sp* repeat to the end ch sp, dc in the final st, slst into the top of the ch 2, turn your work (20)
Round 3: ch4 (counts as st and ch 2), 2dc in the next st, ch 2 and skip a st, *2dc in the next st, ch 2 and skip a st* dc in the last st, slst in the 2nd ch of the ch 4, turn your work
Round 4: ch 2, dc in the next st, 3dc in the next ch sp, *dc in the next 2 sts, 3dc in the next ch sp* repeat to the end, slst in the top of ch 2, turn your work (50)
Round 5: ch 2, dc in the next 4, 2dc in the next, *dc in the next 5, 2 dc in the next* repeat until you have 2 left, dc in the last 2, slst in the top of ch 2 (58)
From here we will work in continuous rounds. Mark your first chsp so you know what round you are on.
Round 6: *ch 4, skip a st, slst in the next st* repeat until you slst into the first chsp
Round 7-17: *ch4, slst in the next chsp* repeat til you slst into the first chsp of the round
Round 18: *ch3, slst in the next chsp* repeat til you slst into the first chsp of the round
Round 19: *ch2, slst in the next chsp* repeat til you slst into the first chsp of the round
Round 20: hdc into each slst and ch starting from the next slst after the chsp you just made
Row 21: sc in the next st, *sc2tog, sc* repeat to the end
Row 22-26: sc around
Row 27: sc in the next 14 sts, ch 35, skip the next 14 sts, sc in the next 14 sts, ch 35, skip 15 sts
Row 28: sc in the next 14 sts, sc across the ch 35, sc in the next 14 sts, sc across the ch 35
Row 29-30: sc around
Slst into the next st when finished with row 30. Fasten off and weave in all loose ends.

Ending Remarks
I stuffed my Middleton Market Bag with yarn. What will you be collecting in your market bag?
Keep in touch by following me on Instagram or Facebook! Remember to use the hashtag #modestybylaura with your makes!
Happy crocheting!
XO,
Laura

This post may contain affiliate links. I am paid a small commission if you make a purchase through the links on my site. Thank you for supporting my blog in this way.

Are you having a hard time finding the perfect Mother's Day Gift? No worries, I have put together some cute, some fun, and some beautiful patterns that you can pick and choose from.
🧶🧶🧶🧶
Mrs. Nesbitt Inspired Apron
🧶🧶🧶🧶
The Nutmeg Apron
🧶🧶🧶🧶
SPA SETS
Tea Rose Spa Set
🧶🧶🧶🧶


🧶🧶🧶🧶
Luxe Spa Scrubby Set

🧶🧶🧶🧶
ACCESSORIES


BAGS

🧶🧶🧶🧶
The Bobblelicious Bag


🧶🧶🧶🧶
The Beach Blossoms Market Bag
🧶🧶🧶🧶
WEARABLES
Rose Finch Capelet
🧶🧶🧶🧶
Proserpina V Stitch Crochet Shawl
🧶🧶🧶🧶
The Elizabeth Shawl
🧶🧶🧶🧶
Everlasting Infinity Scarf
🧶🧶🧶🧶
Cherry Blossom Scarf
🧶🧶🧶🧶
Midsummer 3 Way Infinity Scarf
🧶🧶🧶🧶
The Pearl Shawl
🧶🧶🧶🧶
Amigurumi
Tulip Bulb
🧶🧶🧶🧶
Easy Little Cactus
🧶🧶🧶🧶
Loving You Flower Pot
🧶🧶🧶🧶
FOR THE HOME

🧶🧶🧶🧶
Rose Granny Square Afghan

🧶🧶🧶🧶

Luxe Bobbles Crochet Throw Blanket
🧶🧶🧶🧶
Beginner Herringbone Half Stitch Blanket
🧶🧶🧶🧶
Waistcoat Crochet Basket
I hope that you were able to find something that caught your eye so that you make something special for the mothers in your life this year.
Until next time, happy crocheting!
XO,
Laura
This post may contain affiliate links. I am paid a small commission if you make a purchase through the links on my site. Thank you for supporting my blog in this way.
Waistcoat Crochet Basket
Until next time, happy crocheting!
XO,
Laura
This post may contain affiliate links. I am paid a small commission if you make a purchase through the links on my site. Thank you for supporting my blog in this way.


The Nautical Tote is a beautiful and simple bag that includes both knit and crochet. The body of this tote is knit while the handles are crocheted. The body includes some eyelet v-stitches to make it stand out a little from just a plain colorblock tote.
Pattern

Materials
-5.0mm knitting needles-4.5mm crochet hook
-a skein of Loops and Thread Impeccable in colors gold, pale gray, and sapphire
-tapestry needle
Gauge
Crochet straps: every 16 stitches equal 4 inchesTote Body: every 25 rows and 18 stitches equal 4 inches
Measurements
Notes
To alter the length, crochet more rows for a longer tote and less for a shorter tote.
For a smaller or wider tote, simply cast on in multiples of 12+1.
To make your handle straps longer increase the number of beginning chains. To shorten them, decrease the number of beginning chains.

Let's stay connected! Visit me on Instagram. See you there!
Happy knitting!
XO,
Laura
This post may contain affiliate links. I am paid a small commission if you make a purchase through the links on my site. Thank you for supporting my blog in this way.


The Middleton Purse is a basic and classy purse that will be sure to impress all your friends. The purse is just big enough for wallet and a makeup pouch. Great date night or out on the town bag. If you haven't crochet a bag before, this is a great purse to make.
Summer time is a tough season to design in my opinion. With the heat, it doesn't seem like a lot of people are interested in touching yarn. I can attest to it as I have lost my "crojo". So I decided to create the Middleton Collection. The collection includes this Middleton Purse, Middleton Tote, and Convertible Bow Bag. There is one more that is a part of this collection which has not debuted and will probably be introduced Summer 2020.

Materials
Abbreviations
Gauge
Notes
Pattern

Back Panel and Flap

Front Panel
Side and Bottom Panel

Assembly


I hope that you find the Middleton Purse crochet pattern a fun one to do. Stay connected with me on social media. See you there!
Happy crocheting!
XO,
Laura
This post may contain affiliate links. I am paid a small commission if you make a purchase through the links on my site. Thank you for supporting my blog in this way.


Social Icons